UBITX V6 – THE FULL KIT
This is a “Do it Yourself” project kit and is not backed by any warranty.
Support is offered only through the BITX20 group which you can visit here.
The manufacturer participates in this group and has done troubleshooting to resolve customer setup or defective concerns. In the rare instance of a defect, it would be handled with the manufacturer.
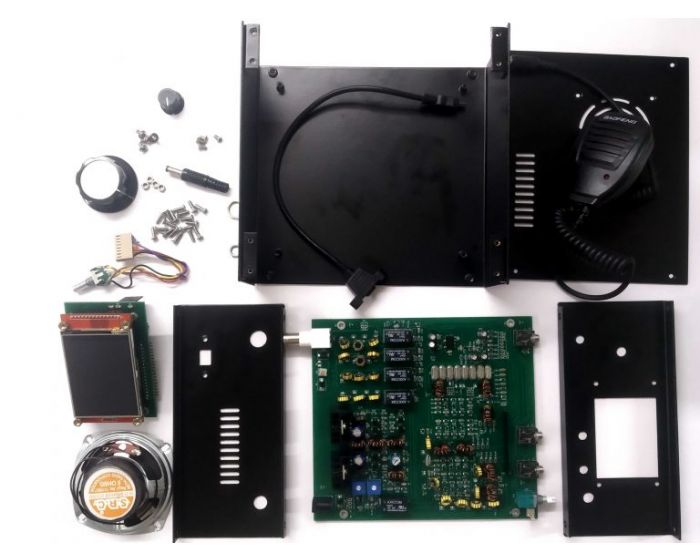
Contents of the Full uBITX v6 kit:
- Main uBITX v6 board1. Main uBITX board with mounting hardware
- TFT – Raduino Board with Display with mounting hardware for the front panel
- Encoder with pre-soldered cable
- Tuning knob
- Volume control knob
- USB extender cable
- Mounting screws, nuts
- Microphone
- Power supply jack
- Speaker
- Cabinet (box) – chassis, front, back panel, and top panels
Operating the Radio
- VFOs The VFOs A and B are switch by simply touching on either of them. The white box shows the currently active VFO
- RIT Touch the RIT to enable Receiver Incremental Tuning. Touch it again to turn it off
- USB/LSB Touch on either of the buttons to choose the sideband
- CW Touch to enable CW mode. In CW mode, you can also use your microphone’s PTT for transmitting a quick morse code message. Choose your keyer from the setup menu
- SPL(IT). Touch to enable Split operating. Now, the VFO A becomes the transmitting frequency and the VFO B is the receiving frequency. It is great for working DX!
- Bands Touch on any band buttons to quickly switch to the band
- WPM (CW) Set the CW sending speed of the keyer
- TON(E) Set the sidetone frequency
- FRQ Allows you to enter a frequency directly using a keypad shown in last image.
- The uBITX has plenty of power at 80m and a decreasing amount for every band you go up with close to 2W at 10m.
Support: Utilize the Groups.io Forum https://groups.io/g/bitx20
Software
The Arduino source code for the µBITX is available on https://github.com/afarhan/ubitxv6